THERMAL · Updated May 2026 · 16 min read · EcoHome Intelligence
Attic Insulation Utility Bill Fix: Lower Heating Costs Without Guesswork
If your utility bills spike every winter, attic insulation is often the fastest fix. This guide shows how to inspect your attic, air-seal the biggest leaks, choose the right R-value, and cut heating costs in one weekend.
In This Guide
Why Your Attic Matters
Heat rises. In winter, the warm air your furnace produces floats straight up through your ceiling and into the attic—unless something stops it. That something is insulation, and most homes simply don't have enough. For a baseline before any project, see our guide to the best home energy monitors.
The Department of Energy recommends R-49 to R-60 for attics in most U.S. climate zones. That translates to roughly 14–21 inches of loose-fill insulation. Yet the typical home built before 2010 has R-19 to R-30—less than half what's needed. ENERGY STAR recommends R-60 for uninsulated attics across most of the country (zones 4 to 8), and R-49 where 3–4 inches are already in place.
What that is worth depends on your climate, your heating fuel and how much insulation you start with. ENERGY STAR's average for air sealing plus insulation is a 15% saving on heating and cooling costs.
Safety Warning
Never step between joists in an unfinished attic—you will fall through the ceiling. Walk only on joists or lay plywood boards. Wear an N95 respirator, long sleeves, and safety glasses. Fiberglass and cellulose are skin and lung irritants.
How to Inspect Your Attic in 15 Minutes
Before buying anything, you need to know what you're working with. Grab a flashlight, a ruler, and your phone.
- Measure existing insulation depth. Push a ruler or yardstick down through the insulation until it hits the drywall. Take readings at 3–4 locations. Average them.
- Identify the insulation type. Fiberglass batts are pink or yellow and look like cotton candy. Loose-fill fiberglass looks like tiny puffballs. Cellulose is gray/fibrous and denser. Vermiculite (gray pebbles) may contain asbestos—stop and call a professional.
- Check for gaps and compression. Look for thin spots, areas where insulation has been pushed aside by wiring or ducts, and spots near the attic hatch where it's often disturbed.
- Look for moisture and mold. Dark spots, water stains, or a musty smell indicate ventilation problems that must be fixed before adding insulation.
Use this R-value chart: Fiberglass loose-fill = R-2.5 per inch. Cellulose = R-3.5 per inch. Fiberglass batts = R-3.0 per inch. If you measure 6 inches of fiberglass batts, you have roughly R-18. You need to add R-30 to R-40 more.
Air-Seal Before You Insulate
Insulation slows heat transfer, but it doesn't stop air movement. If you add insulation over air leaks, you're basically building a thick blanket around a draft. Air-seal first: insulation slows heat flow but does not stop air moving through gaps.
Target these leak points in order of impact:
- Attic hatch/door. Often the biggest single leak. Use weatherstripping tape on the frame and rigid foam board glued to the back of the hatch.
- Recessed light fixtures. "Can lights" poke through the ceiling into the attic, creating a direct air channel. Cover them with fire-rated airtight boxes or replace with IC-rated LEDs.
- Plumbing stacks and chimneys. Gaps around pipes and masonry are common. Seal with fire-rated caulk or expanding foam (not regular foam near chimneys).
- Duct penetrations. Where ducts pass through the ceiling, seal gaps with mastic or foil tape—not duct tape, which degrades.
- Top plates of interior walls. The horizontal 2x4 where the wall meets the ceiling often has gaps. Seal with caulk or foam.
A blower door test from an energy auditor finds leaks you can't see. Many utilities offer rebates on audits; check yours.
Insulation Products We Recommend
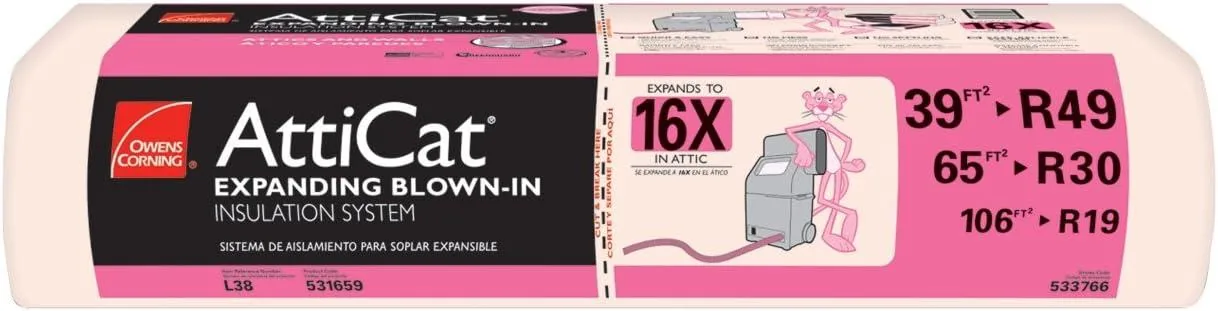
Budget: Frost King Vinyl Foam Tape + Owens Corning AttiCat Blow-In
R-Value Added: R-30
For air-sealing, self-stick foam tape around the attic hatch seals one of the most common attic leaks. For insulation, Owens Corning AttiCat blown-in fiberglass is blown in with a machine; ask whether your store lends a blower with the purchase. The AttiCat system creates consistent coverage without the dense packing that reduces R-value. Best for first-time DIYers who want immediate results without hiring a crew.
Performance: Johns Manville Climate Pro BLOW-IN Cellulose
R-Value Added: R-42
Cellulose has a higher R-value per inch than loose-fill fiberglass and fills irregular spaces better. Johns Manville's Climate Pro is treated with borate fire retardant (not ammonium sulfate, which can corrode ducts) and resists pests. It settles less than generic cellulose. A 1,000 sq ft attic needs roughly 13 bags for R-42 coverage. Rent a blower or hire a crew.
Eco-Premium: Rockwool Comfortbatt + ProCat Blow-In
R-Value Added: R-50+
Rockwool (mineral wool) is fireproof, water-resistant, and doesn't support mold. Use Comfortbatt in rectangular bays and ProCat blow-in for open areas. Rockwool maintains its R-value even when compressed slightly (unlike fiberglass) and provides sound dampening as a bonus. It's more expensive and heavier to handle, but lasts indefinitely and requires no protective gear beyond a dust mask. Ideal for attics with moisture concerns or when maximum fire safety is desired.
DIY Installation Guide
Installing blown-in insulation is a one-person, one-day job. Here's the sequence:
- Prep the attic. Install walkways on joists. Seal all air leaks (see above). Verify bathroom exhaust fans vent outside, not into the attic.
- Install baffles. Foam or cardboard baffles at eaves keep insulation from blocking soffit vents. You need airflow from eave to ridge vent to prevent moisture buildup.
- Mark target depth. Measure from drywall and mark joists with a Sharpie every few feet. Example: If adding R-30 cellulose and starting at R-19, you need about 9 more inches.
- Load the blower. Place the machine outside a ground-floor window. Run the hose up to the attic. Load bags and set the machine to medium airflow.
- Start at the far corner. Hold the hose 3–4 feet away and move side to side. Let the insulation fall like rain—don't aim directly at surfaces. Fill to uniform depth, slightly higher than your marks (loose-fill settles over time).
- Insulate the hatch. Glue 2-inch rigid foam to the hatch back. Add weatherstripping to the frame. Build an insulation dam around the opening to prevent loose-fill from falling when you open the hatch.
Want a room-by-room insulation checklist?
Our energy audit includes attic inspection templates, R-value calculators, and rebate finder links for every state.
Free: Home Energy Audit Checklist (PDF)
A two-page, room-by-room checklist for finding air leaks, standby power and heating and cooling waste yourself, in the order that pays back fastest. Get it now, plus new fix guides by email. Unsubscribe any time.
By signing up you agree to receive emails from EcoHome Intelligence. See our Privacy Policy.
Frequently Asked Questions
How much can attic insulation lower utility bills?
ENERGY STAR estimates an average 15% saving on heating and cooling costs from air sealing plus adding insulation; your result depends on your climate and your starting insulation level. ENERGY STAR recommends R-49 to R-60 for attics in most U.S. climate zones.
What attic insulation R-value do I need?
DOE recommends R-49 (about 16-18 inches of fiberglass) for most US climates. Warmer zones (zones 1-3) need R-38 minimum. Check your existing depth — if it's below the floor joists, you need more.
Is blown-in or batt insulation better for attics?
Blown-in fiberglass or cellulose is generally better for attics because it fills irregular spaces, around obstacles, and between joists more completely than batts. Home improvement stores rent insulation blowers.
Should I air seal before adding insulation?
Absolutely. Air sealing (caulking gaps, sealing attic hatches, weatherstripping) should always come before adding insulation. Insulation without air sealing is like wearing a down jacket with the zipper open.
How much does DIY attic insulation cost?
For a DIY job you pay for air-sealing supplies, the insulation and a blower rental; a contractor adds labor. A contractor charges for labor on top of materials.
Can I over-insulate my attic?
Not really. The law of diminishing returns kicks in around R-60, but going higher won't hurt. The only risk is covering soffit vents, which causes moisture problems. Always install baffles to maintain airflow.
Should I remove old insulation first?
Usually no—you can add new insulation on top of old unless it's wet, moldy, or vermiculite. If the old insulation is compressed to less than half its original thickness, fluff it with a rake before adding more.
How long does blown-in insulation last?
Fiberglass and Rockwool last 80–100 years. Loose-fill settles over the years, so re-check the depth from time to time. Top off cellulose every 15–20 years.
Ready to tackle your entire home?
Download our comprehensive energy audit checklist to find every thermal leak, from attic to basement.
Get the Free Checklist